Pages

Friday, December 16, 2016

Mass Producing Christmas Cards

Today I am back with the next installment of my Christmas card series, Mass Producing Christmas Cards. Sorry for the delay, but I had a good reason. We closed on our house today! Yipee! We will not actually be moving in until January because we have to do some work on it first, but it is all ours now! Hubby and I are super excited!!!

But back to Christmas cards...


I don't know about you, but I make a TON of Christmas cards each year (like almost 300). A little less than 200 typically go to a charity and then the rest get sent out to friends and family. With all of those cards to make, I just do not have the time to make each and every one of those cards unique. To make the process a bit more simple for myself and a bit more practical to fit into my time constraints, I usually assembly line as much of the process as I am able to. While I try not to make more than 5 or 6 of the cards identical, there are certain things that can be done up front and all at once. Below are some of my tips and tricks to making large batches of cards as quickly (and painlessly) as possible! (Warning - this post is a bit text heavy, but I wanted to share my process as completely as possible so it would be easy to repeat!)


Tips and Tricks

1. The first thing I do when I sit down and have all of my supplies stacked beside me is to score and cut down my card bases. I usually score half of my 8 1/2 x 11 inch card stock down the middle with the paper laid vertically on my paper trimmer at 4 1/4 inches and then flip the cardstock so that it is laying horizontally and cut it down the middle at 5 1/2 inches. the other half of the cardstock I score at 5 1/2 inches with the paper laying horizontally and cut at 4 1/4 inches with the cardstock laying vertically on the paper trimmer. I usually do these 50 sheets at a time, which make 100 card bases, so that when you go to sit down and make cards you can just grab a pre-cut and folded card base to decorate. I would do them all at once, but I simply don't have the space on my desk. After I get through the first batch of card bases, I repeat the process all over again.  


2. After I am done cutting down the card bases, I go through my Christmas themed paper and pick out those I want to use for card backgrounds and trim them using a paper trimmer (at 4 1/4 x 5 1/2 for A2 sized cards) or, using a border die, cut them down using my Cuttlebug. When I use dies, I use the largest die that will fit onto the front of an A2 sized card. I cut down the same number of card backgrounds as card bases so that I can whip the cards together by batches without having to stop and find more papers to cut down. You can always trim down additional paper for the individual elements as you go, but you know that you are going to need at least as many pieces of patterned paper for card backgrounds as you have card bases. 

3. Don't just pull paper from your Christmas paper stash for your cards, look through your existing paper stash (6x6 and 12x12 papers) to see what you can use. You'll be amazed at how much paper you have that will work for your Christmas cards.


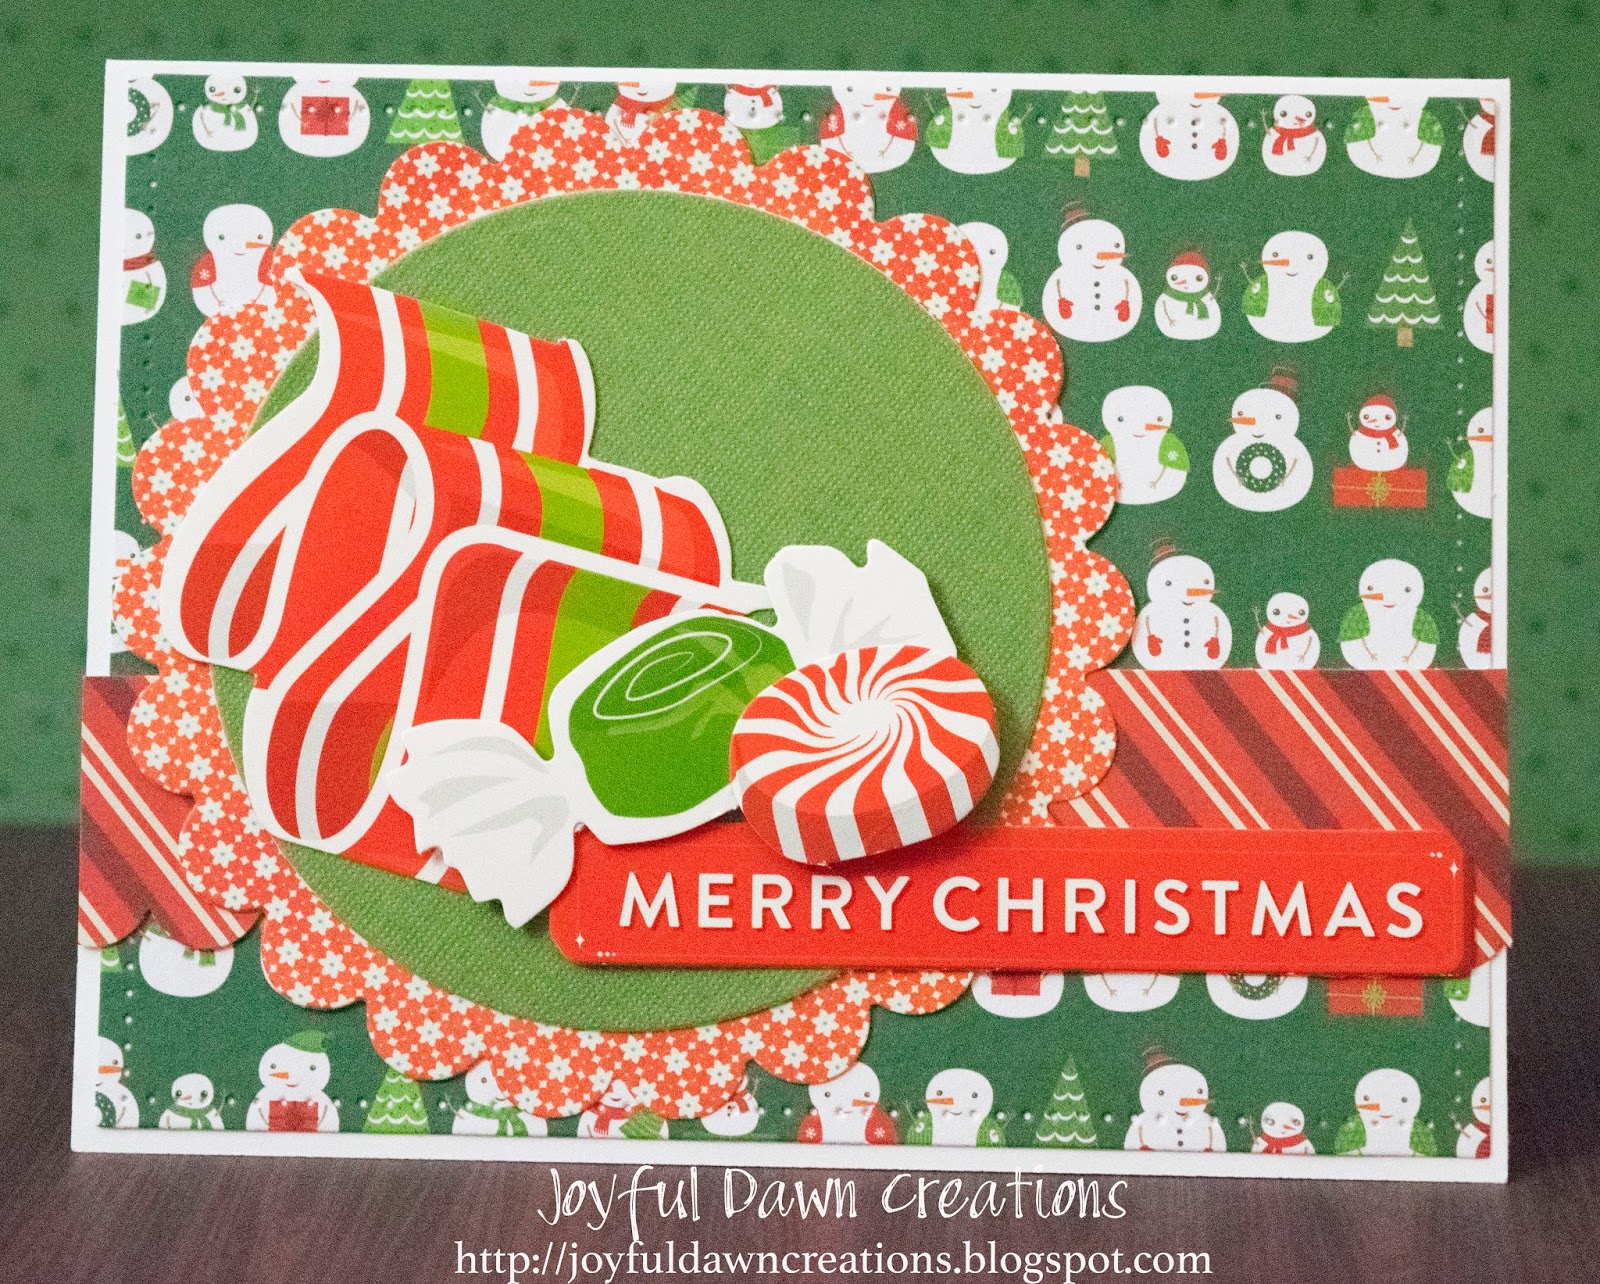
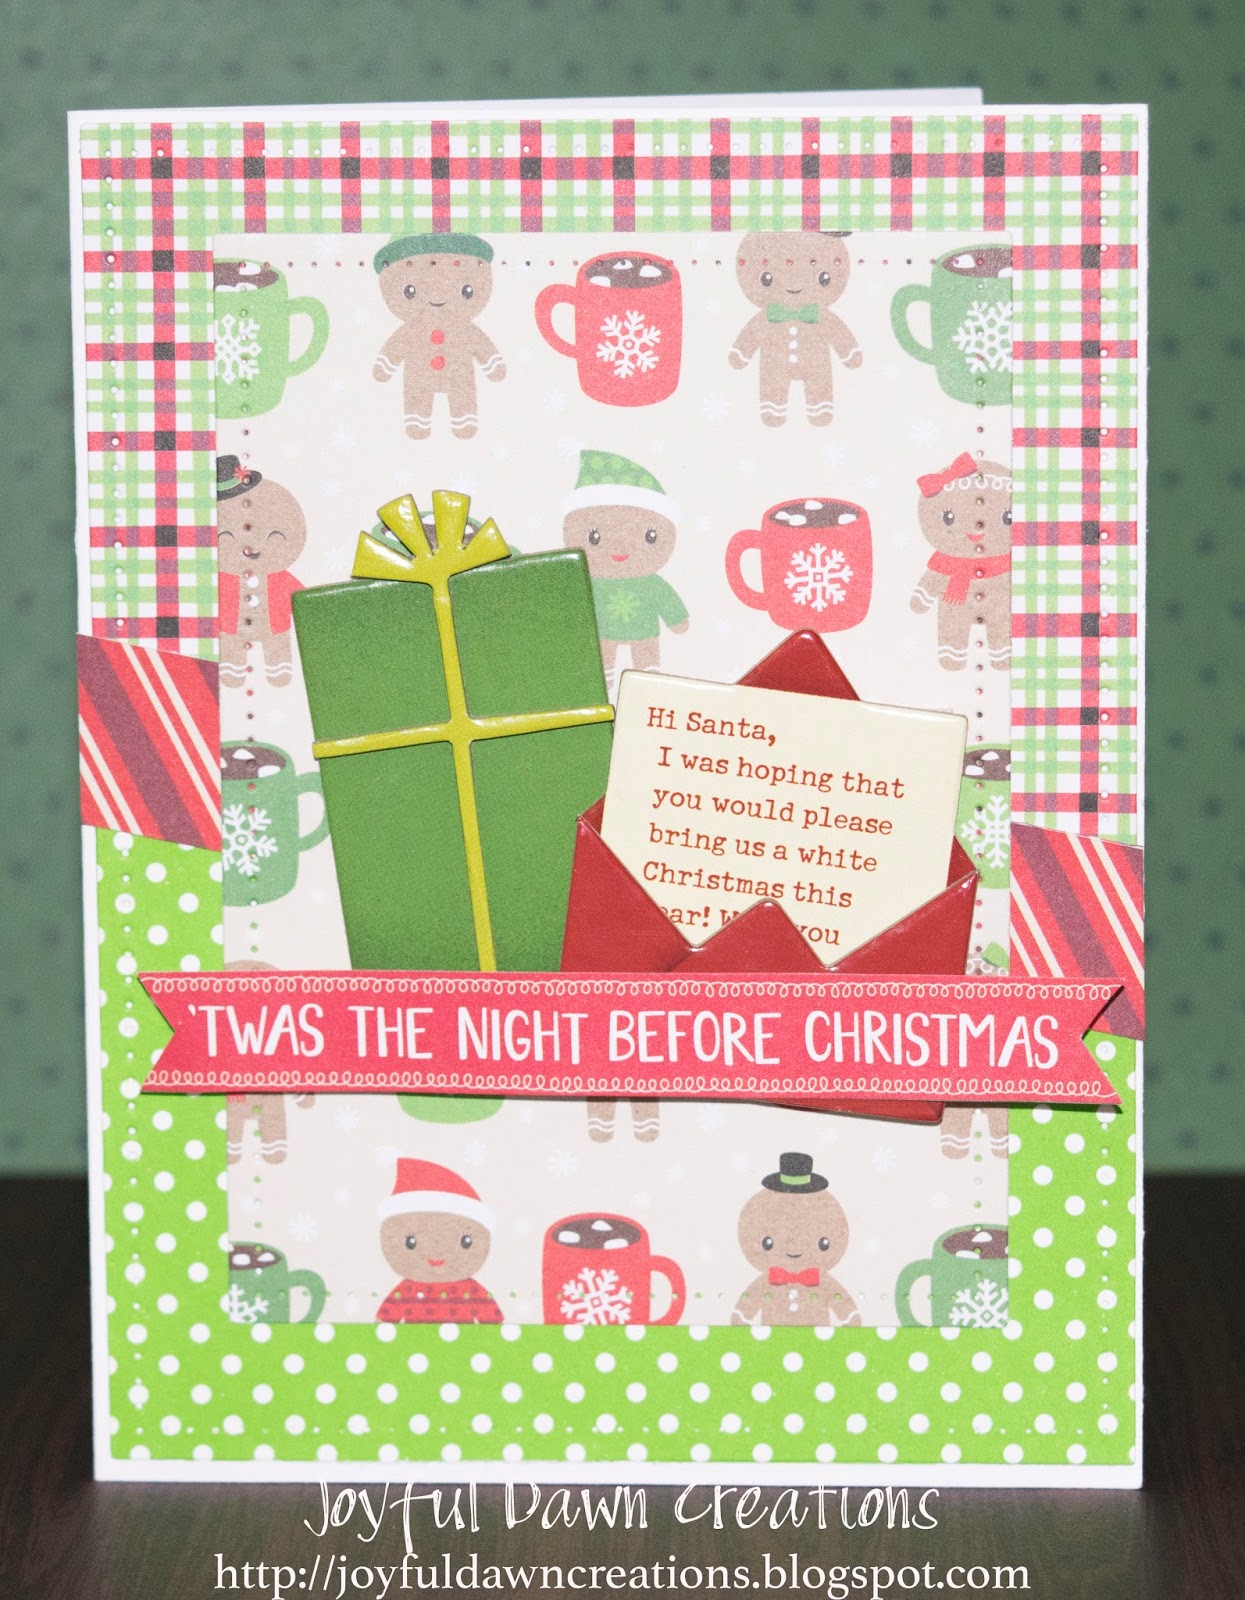
4a. Go back through your Christmas paper and pull out all of the papers that have cut apart elements - anything with Christmas sentiments or images that you can cut down to be the focal point of a card. Cut down each of these elements so that when you start making your cards, you have a nice supply of already completed elements that you simply need to attach to your card fronts with adhesive.


4b. Go through any Christmas-related embellishment packs to see if there are any that would make a good focal image or sentiment on a Christmas card.

5a. Get out all of your Christmas stamps and inks (I usually stick to black and brown nicks to make this step a bit faster than bouncing back and forth between a bunch of different ink colors) and stamp all of your Christmas images and sentiments out at one time. This way you have a bunch of images that you can color while doing something like watching tv.

5b. Color your images in all in one step (not necessarily one time, but before moving on to fussy cutting/die cutting out your images and/or sentiments and putting your cards together).

5c. Fussy cut/die cut all of your images and/or sentiments down in one step. This way you do not have to keep pulling out your paper trimmer and/or die cutting machine and dies over and over again while you are trying to make your cards. 


6. Give yourself a stack of die cut panels, whether circles, rectangles, ovals, or other shapes, to add interest to your cards. By cutting a bunch at once, you have a nice variety to choose from without having to stop in the middle of making a card and go through all of your paper pads to find a specific piece of paper that you then have to put through your die cut machine before getting back to your card.


7. After each step is complete, I typically take all of the pre-cut or pre-made elements and put them each into plastic baggies - I usually use the quart sized ones and put all of the card bases in one or two baggies, all of the bases in another baggies, etc. This keeps all of the elements separated and safely stored away when I am not crafting and makes all of the elements easy to find and go through when I am ready to sit down and work on the cards.


8. It's time to put your cards together! With all of the hard work already complete, you should be able to make your cards in record time!

Wednesday, December 7, 2016

Using your PC to Simplify Christmas Card Making

Hello all, today I am hopping on to share the next installment of my Christmas Card Making Like a Scrapbooker, How to Use Your PC to Simplify Christmas Card Making. I don't know about you, but I only have a limited amount of sentiments for Christmas time and after a while, I get tired of using the same ones over and over again or I want a bigger sentiment to be the focal point of the front of the card. When that happens, I like to either use a Bible verse  or use a font I have found online with Christmas images instead of letters. I just type it on to the page and then make the image bigger until it is the size I want it (I have a number of Christmas fonts saved on my Pinterest board, Fonts). I've saved a number of font to my computer because I really like having all of the different options for sentiments or images. Downloading a font is pretty easy (at least it is on a mac) but if anyone has any questions I can do a tutorial on downloading fonts to a mac.

Below are a couple of cards that I made using downloaded fonts, which I used for personal  uses only and an image of the three wise men that was also pulled from an online font.


Card 1: The Three Wise Men

When using an image from a font, you are typically going to have to re-size it to at least a font size of 175 to have it big enough to cover a card. I like to print my sentiments on kraft cardstock, as well as cream cardstock, and white card stock. I think that the black ink pops beautifully against those colors. I like the classic, elegant look of the black myself, but you can always choose other colors of ink to use


Card 2: Unto Us a Child is Born


For this card, I looked up one of my favorite Christmas-related verses in Isaiah 9:6, "For unto us a child is born, unto us a son is given: and the government shall be upon his shoulder: and his name shall be called Wonderful, Counseller, The mighty God, The everlasting Father, The Prince of Peace." I tried a bunch of different fonts before settled on the one in the cards below and then I just did a quick search online for a nice, simple star image that I could add over the bible verse. For these cards, I was in a bit of a rush to finish so I simply cut them down to fit the card with my paper trimmer. These three cards were super easy and came together really quickly. I think I made all three in under 10 minutes.


Tips and Tricks: 


When I download a new font made up of images I immediately pull Word up and type out the entire alphabet in the new font, print out the sheet with the new fonts and then write the letter of the alphabet the image corresponds to so that when I go to use one of the images I can just pull the sheet up and know which font and which letter to use rather than having to always type through the alphabet trying to remember which letter I was supposed to be using.


Sunday, December 4, 2016

Christmas Card Making Like a Scrapbooker, Part 2 (Continued...)

In my second installment of Part 2 of Christmas Card Making Like a Scrapbooker, I want to share a few cards that have a little bit more embellishments than just the 12x12 pad of paper - primarily enamel dots, letter stickers, and Thickers.

I followed the same process, except I did a bit more fussy cutting than the other cards and layering.


Card 1: Let Your Heart be Light

For this card, I took one of the patterned papers and fussy cut some of the white branches and then cut out another sentiment from one of the pages filled with sentiments. To make the card have a bit more impact I layered the sentiment with additional patterned paper and raised them up with adhesive foam. I then tucked in some of the branches underneath the sentiment and finished off with enamel dots and a dotted line around the edge that I drew with a white jelly pen.  This makes a nice impact without needing too many additional supplies (just a white pen, that can be used multiple times).  With the exception of the fussy cutting that took me about 15 minutes, the rest of the card came together in under five minutes.


Card 2: Be Merry

This second card is a super simple card with no dimension so that it can go through the mail easily with no additional postage. One of the patterned papers in the mambi "Merry Christmas" paper pad had a gorgeous cream text paper with white glittery snowflakes around the top and bottom of the paper. To get a full impact of the snowflakes I stayed simple with the sentiment. For the sentiment, I grabbed a pack of red glitter Thickers for the "Be" and then fussy cut the "merry" from the paper pad. I finished it off with a white dot line along the bottom half of the card because it just seemed to be missing something after I completed the rest of the card. 


Card 3: Merry Christmas

This card follows the same pattern, except I added mini letter stickers instead of Thickers. The process is so simple. I really just cut down several papers at once to get the nicest backgrounds of the cards and then cut out all of the sentiments one evening while I was watching tv. Because of the prep work, these cards took less than 5 minutes each to complete. The assembly line method really is key to being able to complete so many cards  in a short amount of time.


Tips and Tricks

Using a white pen to create a border, whether dotted or solid, is a nice way to finish off a card, especially one that has a dark base.

When cutting your papers for bases, remember to look at your papers and think about which cuts will leave you with a base with the most impact, or the prettiest orientation of the pattern on the paper.

                               __________________________________________

I hope that you are all enjoying this series and will be back in a few days for the next part of the series: Using your PC to make Christmas card making more simple and less expensive.

Also, if you would like to keep up with the posts that I share here and other snippets, you can follow my artist page on Facebook at https://www.facebook.com/joyfuldawncreations/

Monday, November 28, 2016

Christmas Card Making Like a Scrapbooker, Part 2

Welcome back to my series on simple ways to make Christmas cards like a scrapbooker. I hope that you all had an amazing Thanksgiving. I know that I did. Got to see the little niece and nephew (who is now walking!!!!!). They are little cuddle bugs and I love every minute I get to spend with them.

Today I want to share some easy ways to make Christmas cards using only card stock for your card base and 1 12x12 pad of patterned paper. Yup, that's right - 1 12x12 pad of patterned paper. No extra supplies like stamps, coloring supplies, dies, etc. 


I found this gorgeous pad of paper from Me and My Big Ideas for $6 on clearance at Hobby Lobby (and I have seen it at several Tuesday Morning stores as well). 


This pad of paper has two sheets with a ton of Christmas sentiments, as well as several sheets with a single large Christmas sentiment that you can cut out and use for a huge impact. 


Card #1: Merry & Bright


For the first card, I selected a sentiment from one of the sheets and freehand cut around the script font. I kept a small border around the sentiment because I liked the contrast between the white font and black background, but also to make the cutting easier on myself. Because I was also using a dark background, I used a small piece (about 1.5 inches tall) of another patterned paper so that the sentiment would stand out more. Plus, by backing the sentiment on paper that has foil on it, you get the additional sparkle and pop to the card without having to add anything else. I did decide to add a few enamel dots to this card because I have a serious problem and can't seem to leave them off of anything, LOL, but they are not necessary at all. This type of card stands well on it own with no additional embellishment.


Card #2: Merry Christmas and Happy new Year

This second card is even more simple than the first. There is NO fussy cutting! I simply took one of the sheets of paper that had a large sentiment that I new would be great for non-traditional sized card and trimmed the image down so that there was a minimal border around the sentiment. Once the sentiment was cut down, I measured the length and width and then trimmed some more of the red chevron foil paper down so that there was 1/4 inch displayed on each side of the sentiment panel. I then measured the foil paper and then cut down a piece of card stock so that there would be a 1/4 inch border of the card stock showing when the card stock was folded in half.


Tips and Tricks

First, if you want to be able to get as many cards as you can out of a single pad of paper, you want to select an option that already has sentiments in the collection. 

When cutting out sentiments, keep a small border around the sentiment. By leaving the border around the sentiment, you need to be as detailed with the cutting and I think that it looks prettier and more purposeful as well.

Don't be afraid of making cards with different dimensions. Even if you can't find an envelope that exactly matches the size, there are a lot of options for different dimensions at places like Paper Source - or you can just add the card to a package without having to worry about an envelope at all.

Thursday, November 17, 2016

Christmas Card Making Like a Scrapbooker, Part 1

 Christmas Card Making Like a Scrapbooker, Part 1  (Using only Scrapbooking Supplies)

While I have been a card maker almost as long as I have been a scrapbooker, when I am making a large number of cards (particularly at Christmas time when charities + personal cards = lots and lots of cards to make) I try to find ways to simplify the process. Part of that process is finding ways to make cards that are relatively easy and quick to put together. Toward that end, one of the ways I simplify card making is to use Holiday die cut packs to whip together as many cards as I can with the die cuts I have.


The cards below were made with one die cut pack from American Crafts, one dimensional chipboard sticker pack from Shimelle's Christmas line, one 6x6 paper pad from American Crafts, and a few scraps that I had in my scrap basket. I always make sure to look through my scraps when I'm about to start making Christmas cards to see which scraps I can make
work so I don't waste any paper. Once I've picked out the scraps I will be using, I simply store them with the rest of my Christmas supplies (I limit myself to one 12x12 Iris container so I can't buy new stuff until there is room in the box).

Even the sentiments were either cut from the paper pad or from the die cut pack. I also cut all of the papers down at the same time so all I had to do was to put the patterned paper together with the die cuts, and layered the die cuts with some dimensional foam tape for some interest. 


Tips and Tricks:
One of the easiest ways to make card making easier is to use sentiments that have already been created in a paper pad or to use Christmas-related die cut packs for images and sentiments for your cards. 

Another easy way to make card making easier, especially when making a lot of cards is to do them in an assembly line style. Cut all of the papers down at the same time so all you have to do is to put the patterned paper together with the die cuts. For added interest and texture, you can easily layer the die cuts with some dimensional foam tape. 

I did cut some round and scalloped shapes with one border punch and a couple of dies, but you could easily put these cards together with just using a paper trimmer to cut different sizes of squares and rectangles (or really any angular shapes). Before I had dies, I also would sometimes get a glass from the kitchen trace a circle on the patterned paper and then carefully cut it out. It does take a little longer but if you want some variety to your cards without having to shell out the money on new dies, the cup/cut method definitely works. :) 

Once I had cut down all of the papers I wanted to use, these cards took less than 5 minutes a piece to put together and they are so easy that (if you spend a few minutes cutting down your papers and card bases beforehand) you can easily knock out ten or fifteen while watching 1 one-hour show! And the best part about it is that you don't have to worry about having inks or Christmas stamps which can cost a bit of money to invest in. Plus, if you have trouble being super creative with card layouts because they can seem so different to scrapbook layouts or not great at stamping clear images and then coloring them in, this takes all of the stress out of card making! The images have already been created and colored for you!

Christmas Card Making Made Simple


Hello, All! Ashley here. So its been a while since my last post. In the almost year that has passed, a lot has been going on in life. Hubby and I moved to Florida, we both decided to go back to school, I started working again (part time from home), and we just bought a house! With all of the changes in life and the busyness of it all, I thought I would do a series on how I simplify my Christmas card making to fit it all in and keep costs down so it doesn't cut into other Christmas budgets (too much anyway ;) ).


I thought I would break it up into 5 different categories:
1. Christmas Card Making Like a Scrapbooker, Part 1  (Using only Scrapbooking Supplies)
2. Christmas Card Making Like a Scrapbooker, Part 2 (Making Christmas cards from only 1 12x12 pad of paper and some card stock)
3. Using your PC to make Christmas card making more simple and less expensive
4. Mass Producing Christmas Cards
5. Cost vs. Quality - items it is okay to go cheap on and items that are worth the investment


I'll be back tomorrow for the first post on Christmas Card Making Like a Scrapbooker, Part 1! In the mean time, I hope that you are all having a wonderfully scrappy week!


Wednesday, February 17, 2016

Another Scrapbooking Project

I think I am a glutton for punishment because I have been working on yet another massive project for a gift. Last time it was all of my mother's pictures, this time it is all of the childhood pictures of my husband. Since I am coming to the close of my efforts, I thought I would share a few layouts. so far it is 2 albums thick and is a mixture of pocket pages and full 12x12 layouts. Sorry for the glare - I didn't take the pictures until I had already put them into the page protectors.


I didn't use any specific collection - I typically just pull things together from my stash that look like they will coordinate and go from there.


Thursday, February 11, 2016

Christmas Friends

Hello all, I thought I would pop in this evening to share a layout that I made recently. Every year, many of our friends have begun sending us photo cards for Christmas. Since I don't want to just throw them out, I cut the photos out and use them on layouts. I have an entire binder dedicated just to layouts of friends.

I used Shimelle's original collection, as well as MME decorative tape and some red sparkly Thickers. The heart punch is a small punch that my cousin gave me (I think that it came from the Michaels dollar aisle).


Monday, February 8, 2016

Happy Valentine's Day!

Tis that time of year again... Once again, I participated in Winter Sims' Caring Hearts Card Drive that sends Valentines to sick kids at St. Jude's Hospital. Thanks to my dear cousin, I was able to rotate some new images into my valentine card selection.  I used the "Purrfect Pair" stamp set from mama elephant.com, the "Sail Away Sayings" stamp set from the Sweet Stamp Shop, the "Love From Above" stamp set from mamaelephant.com, and a few other sets, as well as a few ephemera packs from Pebbles. The papers came from a number of paper pads, i including "Yours Truly" by Pebbles, and several scraps from various collections...